

Make yourself a 12" x9" rectangle for your pattern piece. Take that pattern piece and cut out 4 rectangles of your desired fabric, and 1 rectangle of fleece...
.JPG) |
| Guilty secret...I actually used the Band Pattern Piece for my Reversible Hat folded down to the 9" size! |
Next, pin fleece to WRONG side of one of your 4 fabric pieces and stitch in place using 1/4" seam allowance..

Now take another of your Fabric rectangles and fold it in half longways with wrong sides together, pin this to the fabric side of your fleece/fabric rectangle, raw edges on the bottom...

And stitch along sides, using a 1/4" seam allowance...
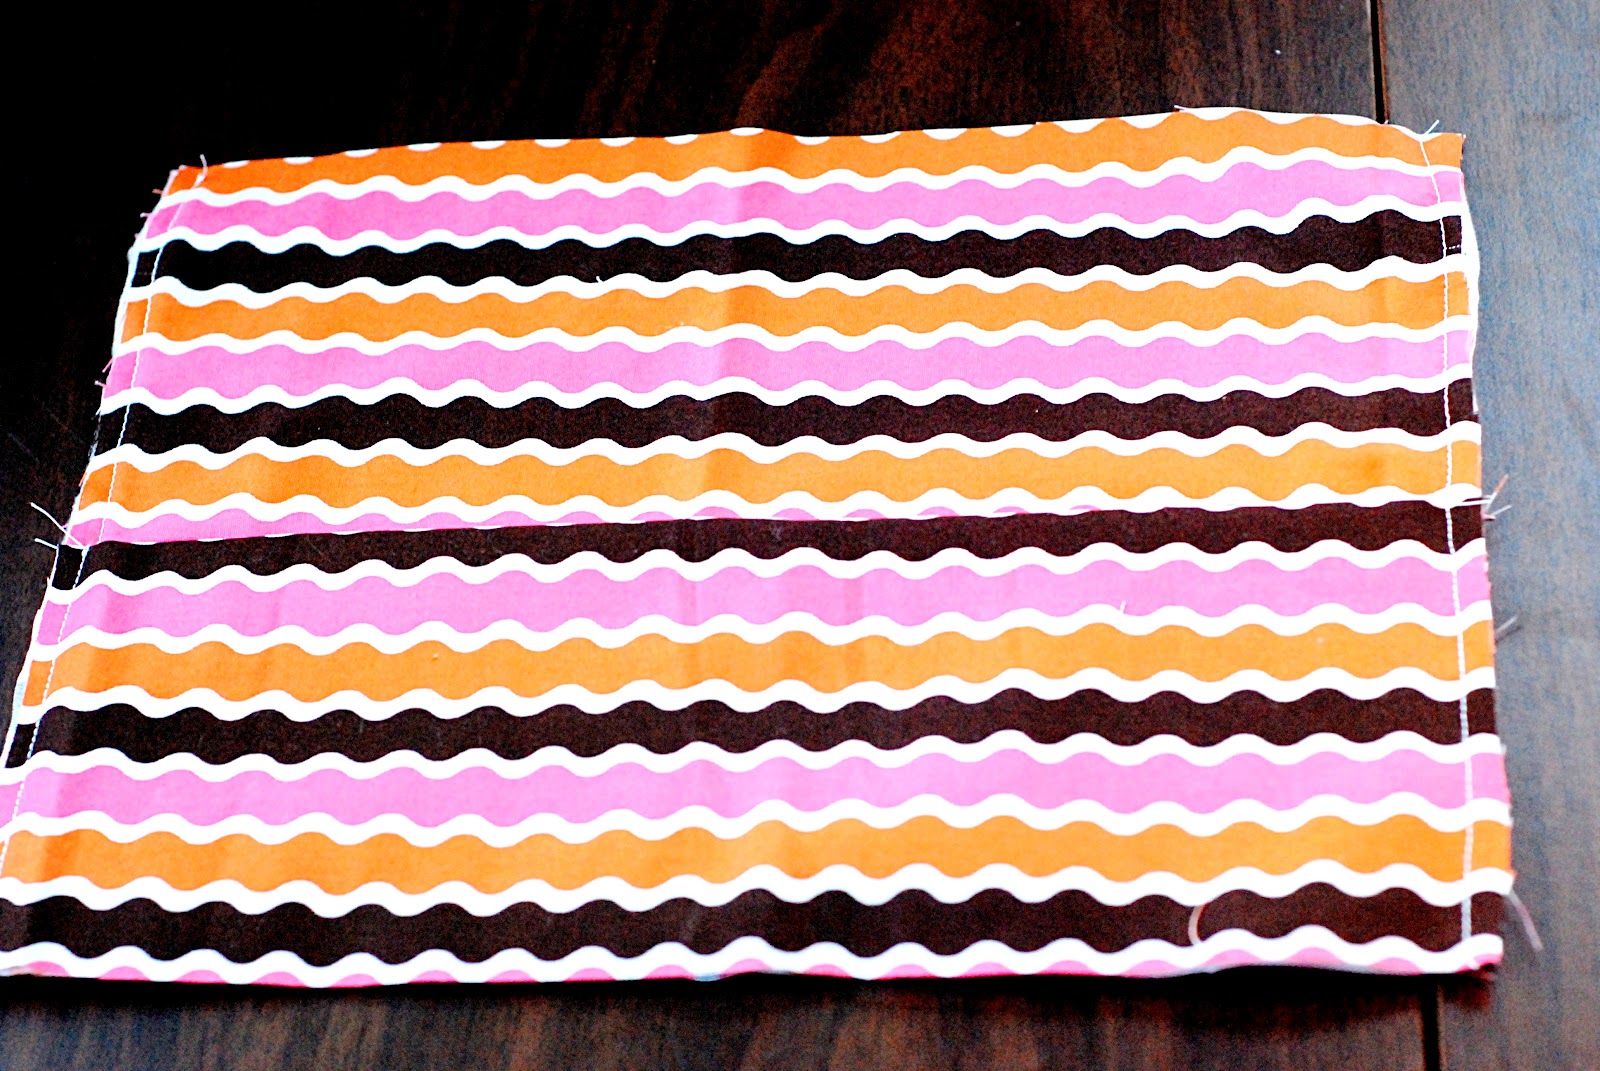
Now grab a ruler and a marking pen/pencil and mark lines on the folded over piece(pocket) where you want your pockets divided, I just used the width of my ruler as a guide (i think it's close to 1" spacing)...

Now stitch where your lines are...
 |
| and trim your threads of course! |
Now take your third fabric rectangle and fold in half lengthwise, RIGHT sides together, stitch short sides together using a 1/2" seam allowance. Turn right sides out....


Now take the piece(this is your pencil keeper flap) and align it to the top of your pocket piece, raw edges along the top...

And take your last rectangle and place it over everything, right side down and pin...

Now take a piece of ribbon(I used grosgrain) about 12-18" long, fold it in half, stuff it under your top piece right now and place the fold on one side of your pocket section, halfway up or so and pin...

Now stitch around the whole thing with a 1/2" being careful not to catch the flap on the sides while sewing, and leaving a space at the bottom for turning. Turn right side out....

And you're done!!!!!!


Happy Crafting!!
No comments:
Post a Comment